
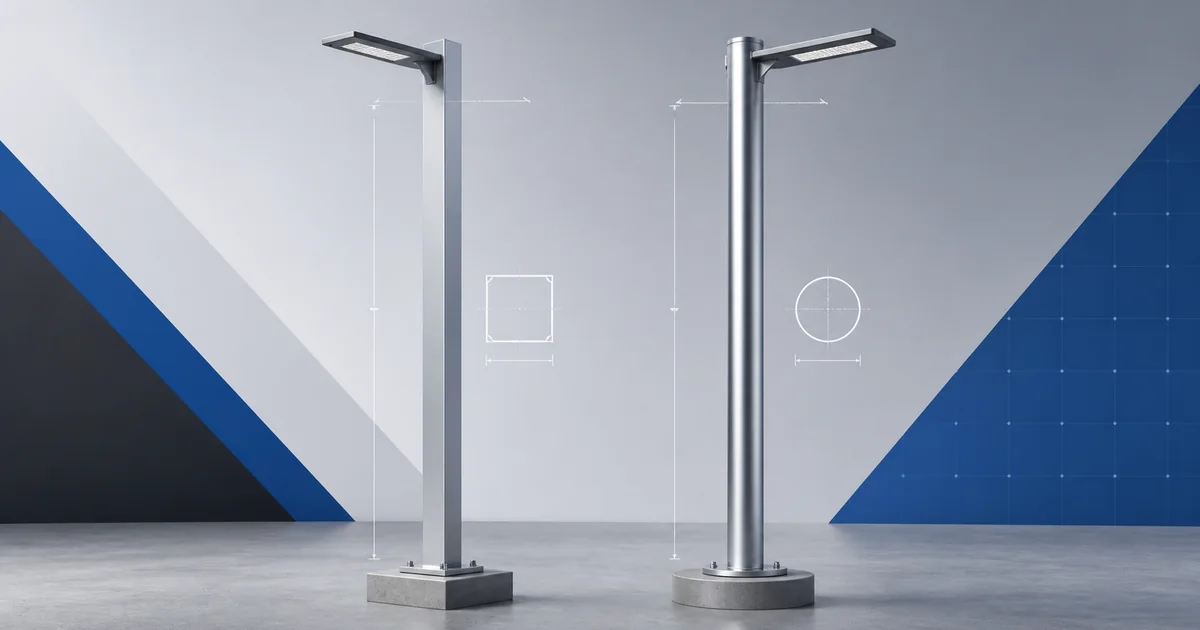
Square and round aluminum light poles can both support commercial, municipal and site-lighting projects. The best option is not decided by a single visual preference or by a catalogue photograph. It should follow a documented brief that includes the luminaire, mounting arrangement, pole height, wind criteria, site exposure, foundation interface, finish and installation requirements.
This selection guide compares the two common shaft profiles in a practical, specification-led way. To review broader options, visit our aluminum light pole collection; for a profile-specific commercial option, see our square light pole page.
1. Begin with the complete application
Define whether the pole serves a parking area, pathway, campus, commercial frontage, streetscape or a site with special equipment. Include pole height, quantity, fixture model, mounting arrangement, site wind criteria, finish and foundation information. The profile should support that brief rather than replace it.
Record this decision in the project brief and confirm it during drawing approval. Dimensions, mounting details and the responsible design assumptions should be visible to every party before manufacturing begins. This disciplined approach avoids on-site improvisation and gives the buyer a configuration that can be compared clearly with alternative square or round options.
2. Understand the profile difference
A square aluminum light pole has four planar faces and defined corners. A round aluminum light pole has a continuous circular shaft. Both profiles can be used with outdoor luminaires and accessories when they are designed and fabricated for the specific project. The choice changes appearance and detail coordination, not the need for engineering.
Record this decision in the project brief and confirm it during drawing approval. Dimensions, mounting details and the responsible design assumptions should be visible to every party before manufacturing begins. This disciplined approach avoids on-site improvisation and gives the buyer a configuration that can be compared clearly with alternative square or round options.
3. Use square poles for architectural rhythm
Square shafts are often chosen where buildings, paving grids, bollards, signage or other rectilinear elements create a formal visual language. Their faces can make arm orientation and repeated alignment easy to communicate on drawings. They are frequently considered for plazas, commercial developments and pedestrian-oriented areas.
Record this decision in the project brief and confirm it during drawing approval. Dimensions, mounting details and the responsible design assumptions should be visible to every party before manufacturing begins. This disciplined approach avoids on-site improvisation and gives the buyer a configuration that can be compared clearly with alternative square or round options.
4. Use round poles for a softer profile
Round shafts are commonly selected for roads, parking, campus routes and general area lighting where a smooth, simple vertical line is desired. A round profile can coordinate naturally with circular luminaires, decorative bases and existing round pole families. It can be straight or tapered depending on the specified configuration.
Record this decision in the project brief and confirm it during drawing approval. Dimensions, mounting details and the responsible design assumptions should be visible to every party before manufacturing begins. This disciplined approach avoids on-site improvisation and gives the buyer a configuration that can be compared clearly with alternative square or round options.
5. Keep structural selection separate
A square pole is not automatically stronger than a round pole, and a round pole is not automatically lighter. The governing design depends on shaft geometry, material and temper, wall schedule, height, fixture EPA, arm geometry, wind criteria, openings, base plate and anchorage. Compare approved configurations, not silhouettes.
Record this decision in the project brief and confirm it during drawing approval. Dimensions, mounting details and the responsible design assumptions should be visible to every party before manufacturing begins. This disciplined approach avoids on-site improvisation and gives the buyer a configuration that can be compared clearly with alternative square or round options.
6. Provide fixture information
Ask for the luminaire drawing, weight, effective projected area, slip-fitter or tenon requirement, bracket dimensions and mounting centre. This information helps coordinate the top detail and the resulting loads. Decorative luminaires, cameras, banners and outreach arms can change the appropriate pole selection significantly.
Record this decision in the project brief and confirm it during drawing approval. Dimensions, mounting details and the responsible design assumptions should be visible to every party before manufacturing begins. This disciplined approach avoids on-site improvisation and gives the buyer a configuration that can be compared clearly with alternative square or round options.
7. Decide on arms early
A side arm or double arm needs a documented direction, length, mounting elevation and fixture arrangement. On a square shaft, the desired face orientation should be noted. On a round shaft, rotational orientation still matters for handholes, wiring access and site alignment. Put these requirements on the approval drawing.
Record this decision in the project brief and confirm it during drawing approval. Dimensions, mounting details and the responsible design assumptions should be visible to every party before manufacturing begins. This disciplined approach avoids on-site improvisation and gives the buyer a configuration that can be compared clearly with alternative square or round options.
8. Coordinate handholes and access
Handhole location, grounding provision, internal wire routing and access door orientation must be usable after installation. Coordinate them with arm direction, cable entry and nearby pedestrian flow. A thoughtful access detail helps installers and maintenance teams without compromising the intended visual presentation.
Record this decision in the project brief and confirm it during drawing approval. Dimensions, mounting details and the responsible design assumptions should be visible to every party before manufacturing begins. This disciplined approach avoids on-site improvisation and gives the buyer a configuration that can be compared clearly with alternative square or round options.
9. Apply wind criteria to the assembly
Wind selection requires the project location, exposure, governing criteria and the effective projected area of all attachments. Do not mix attachment data from one option with wind assumptions from another. For a practical input checklist, see our light pole wind load calculation guide.
Record this decision in the project brief and confirm it during drawing approval. Dimensions, mounting details and the responsible design assumptions should be visible to every party before manufacturing begins. This disciplined approach avoids on-site improvisation and gives the buyer a configuration that can be compared clearly with alternative square or round options.
10. Review base plate and anchor pattern
Pole base, bolt circle, anchor bolt details and foundation interface are part of the system. The responsible project team should confirm foundation design, soil conditions and local requirements. A pole can be correctly manufactured yet unsuitable if the foundation or anchors do not match the approved configuration.
Record this decision in the project brief and confirm it during drawing approval. Dimensions, mounting details and the responsible design assumptions should be visible to every party before manufacturing begins. This disciplined approach avoids on-site improvisation and gives the buyer a configuration that can be compared clearly with alternative square or round options.
11. Specify material and finish
State the aluminum alloy and temper where required, then select mill finish, anodized or powder-coated finish according to visual intent and environment. Coastal, industrial and high-humidity sites may need additional project-specific evaluation. Avoid promising a finish performance level without the actual exposure conditions.
Record this decision in the project brief and confirm it during drawing approval. Dimensions, mounting details and the responsible design assumptions should be visible to every party before manufacturing begins. This disciplined approach avoids on-site improvisation and gives the buyer a configuration that can be compared clearly with alternative square or round options.
12. Think about façade and site context
Square poles can echo building edges and paving joints; round poles can reduce visual busyness in a landscaped or open site. Existing fixtures, sign supports, benches, bollards and wayfinding should be reviewed together. A simple site elevation or rendering can reveal which family feels more coherent.
Record this decision in the project brief and confirm it during drawing approval. Dimensions, mounting details and the responsible design assumptions should be visible to every party before manufacturing begins. This disciplined approach avoids on-site improvisation and gives the buyer a configuration that can be compared clearly with alternative square or round options.
13. Compare mounting interfaces
Post-top luminaires, tenon-mounted luminaires, slip-fitters, side-entry arms and decorative brackets each have their own dimensional needs. Confirm interface size, drilling and orientation before fabrication. Both square and round poles can accommodate many arrangements when the final details are approved.
Record this decision in the project brief and confirm it during drawing approval. Dimensions, mounting details and the responsible design assumptions should be visible to every party before manufacturing begins. This disciplined approach avoids on-site improvisation and gives the buyer a configuration that can be compared clearly with alternative square or round options.
14. Plan freight and handling
Shaft length, cross-section, quantity, packaging, protective wrapping and destination access influence shipment planning. The project team should confirm unloading equipment and storage protection. Freight is not a reason to select a profile blindly; it is a scope item that should be evaluated with real dimensions.
Record this decision in the project brief and confirm it during drawing approval. Dimensions, mounting details and the responsible design assumptions should be visible to every party before manufacturing begins. This disciplined approach avoids on-site improvisation and gives the buyer a configuration that can be compared clearly with alternative square or round options.
15. Require a complete submittal
The approval drawing should show height, profile, dimensions, material, wall specification, base plate, bolt circle, handhole, arms, top detail, finish and quantity. It should also identify any unresolved project data. This record is the best way to keep supplier, contractor and designer aligned.
Record this decision in the project brief and confirm it during drawing approval. Dimensions, mounting details and the responsible design assumptions should be visible to every party before manufacturing begins. This disciplined approach avoids on-site improvisation and gives the buyer a configuration that can be compared clearly with alternative square or round options.
16. Compare quotations fairly
Request quotes with equivalent height, attachments, finish, anchorage scope, packing and delivery terms. A price comparison becomes unreliable when one option omits arms, bolts, coating or design assumptions. Transparent scope makes the architectural preference easier to balance with project requirements.
Record this decision in the project brief and confirm it during drawing approval. Dimensions, mounting details and the responsible design assumptions should be visible to every party before manufacturing begins. This disciplined approach avoids on-site improvisation and gives the buyer a configuration that can be compared clearly with alternative square or round options.
17. Install using approved details
Follow the approved anchor layout, manufacturer instructions and local safety rules. Protect finished surfaces, align poles before final tightening and coordinate electrical work with qualified personnel. Field modifications such as drilling or welding should not be made without written technical review.
Record this decision in the project brief and confirm it during drawing approval. Dimensions, mounting details and the responsible design assumptions should be visible to every party before manufacturing begins. This disciplined approach avoids on-site improvisation and gives the buyer a configuration that can be compared clearly with alternative square or round options.
18. Plan inspection and maintenance
Inspect the pole, coating, arms, doors, fasteners, luminaires and any attached devices periodically. Promptly address impact damage, loose hardware or visible surface deterioration. Routine maintenance is needed for either profile and helps preserve the intended appearance over the service life.
Record this decision in the project brief and confirm it during drawing approval. Dimensions, mounting details and the responsible design assumptions should be visible to every party before manufacturing begins. This disciplined approach avoids on-site improvisation and gives the buyer a configuration that can be compared clearly with alternative square or round options.
19. Choose based on the project, not a rule
Select square when its faces and architectural character fit the site and accessory orientation; select round when its continuous profile better fits the lighting layout or existing pole family. Then verify the chosen configuration against the actual loads, wind criteria, foundation and approved drawing.
Record this decision in the project brief and confirm it during drawing approval. Dimensions, mounting details and the responsible design assumptions should be visible to every party before manufacturing begins. This disciplined approach avoids on-site improvisation and gives the buyer a configuration that can be compared clearly with alternative square or round options.
Frequently asked questions
Are square aluminum light poles more durable than round poles?
Durability depends on the specified material, finish, environment, workmanship, installation and maintenance. Profile alone does not establish a durability result.
Can square and round poles use the same fixtures?
Often they can use compatible top or side mounting interfaces, but the exact tenon, arm, drilling and orientation must be confirmed from the fixture drawing.
Which profile should I use for a windy site?
Use the project wind criteria and actual attachment data to select the complete pole assembly. The profile is one of several inputs, not the conclusion by itself.
Request a drawing-ready proposal
Send pole height, fixture information, effective projected area, mounting method, location, wind criteria, preferred profile, finish and foundation details. We can help convert that information into a square or round aluminum light pole proposal with clear, reviewable scope.